Growing Brussels sprouts from seed is one of the easiest things you can venture into, especially when you have the knowledge of how to do it. Brussels sprout is one of the many vegetables you can grow by yourself at home. There are different varieties to choose from and each of them will definitely bring a fruitful harvest if you tend to them properly.
You’ll need to be a little patient with your Brussel Sprout plants though; it’ll take a couple of months before you begin to harvest.
Once harvest time comes, its fresh, crunchy, healthy veggies all the way. Harvesting of Brussels sprouts usually falls within late autumn and could continue into the winter. You can take your time picking your sprouts as the mature vegetables will remain good for up to 7, 8 weeks.
In addition to providing you with fresh ingredients for healthy meals, the plants have an aesthetic appeal. They’ll give your garden a colourful look especially if you grow the purple varieties. You can plant some seedlings amongst your flowers or alongside other vegetables.
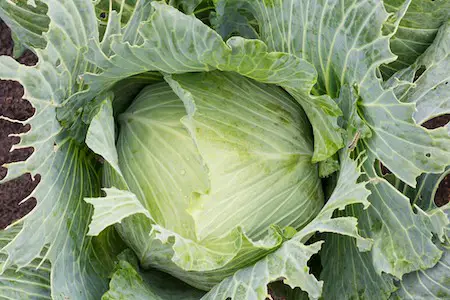
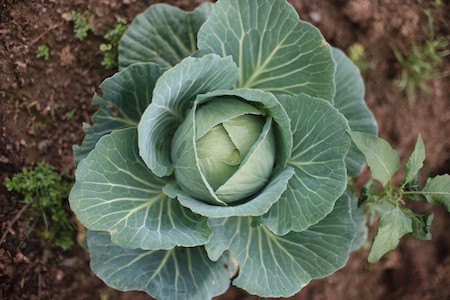
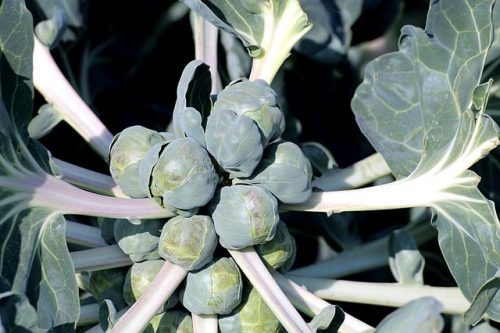
They grow to about 2 – 4 feet tall and depending on the variety you plant, your Brussels Sprouts will either form purple or green leaves. The mature heads resemble those of cabbage. This guide will inform you of how to properly care for your Brussels sprout so you end up harvesting huge, healthy heads after a few months.
Growing Brussels Sprouts From Seed
Yes, you can begin growing Brussels Sprouts[1] from seed. If you live in cold regions, then the best time for planting would fall within late spring and the early days of summer. For those in warmer regions, mid-summer to late summer is great. You should be able to harvest after about four months. You can start growing your seeds indoors first and transplant them to your garden after about 5 or 6 weeks.
There’s also the option of planting seeds directly in your garden. However, bear in mind that young seedlings are highly susceptible to damage by garden pests. I recommend starting them indoors where you’ll keep a close eye on them for a few weeks before taking them outdoors. By then, they’ll be strong and healthy. Lighting is very important when growing plants indoors, keep plants close to a sunny window. Also, get some substitute light source.
You’ll need to get pots or flats for your seeds if you decide to start them indoors, including some starting mix which will serve as growing soil for your seeds. Add some water to the mix for moisture. Plant your seeds about one inch into the soil. Once you’re finished with planting, cover pots up using a plastic wrap or dome.

This will help to preserve humidity which propels seeds to begin sprouting. You can take it off once you observe young sprouts. Ensure your soil doesn’t dry out as moisture is essential for healthy development. Some organic fertiliser every month will also encourage your plants to do well.
While your young plants are indoors, they may not have full access to sufficient sunlight during the day. You need some artificial light sources like grow lights. Use grow lights when starting your seeds indoors to ensure that the plants get the amount of light they need to thrive. Ensure all conditions are favourable by constantly monitoring the moisture level and lighting.
Transplanting Brussels Sprout to Your Garden
About a few days to when you intend to transplant the young Brussels Sprouts, prepare your garden soil. Brussels Sprouts requires healthy soil and full sunlight. Treat the soil with some composted manure or organic fertiliser. Your plants should be spaced about 18 – 24 inches and the rows should have 3 feet in between. For those who’ll directly sow seeds on the garden, 6 inches between seeds will be fine.
Brussels sprouts belong to the cabbage family which means they’re susceptible to cabbage worms so you’ll need to protect your plants from infestation. You can cover up plants using an insect-repelling material. This will keep the insect from laying its eggs all over your plant. You can use this cover immediately after you complete the transplanting process. There’s the option of floating the cover with hoops as well.
If you’ll be using pots for Brussels sprouts, ensure they’re large enough so the plants have enough room as they grow. Some compost manure will also provide the soil will with more nutrients and increase its ability to retain water.
While you’re waiting around for harvest time to come, there are few things you should do to ensure your plants remain healthy and develop properly:
- Provide Moisture: Watering your plants regularly is important if you want them to turn out okay. It gets dry during summer so you have to ensure the soil is constantly moisturised. Creating a schedule where you’ll water twice each week will benefit your plants. Add some grass clippings or straw to enable the soil to retain moisture for longer.
- Fertilise: Your plants require nutrients to thrive. Brussels sprouts take months to fully mature. During that period, you need to ensure the plants get the nutrient they require. Use fertiliser twice during its growing season with about 6 weeks between each time. Any organic fertiliser will work fine.
- Staking: Your plants could get to about 4 feet high. They may begin to topple over and staking will help prevent it. Staking is necessary especially when you’re working with lighter soils (loam or sand); clay soil usually holds plants more firmly. How do you go about staking? Get bamboo stakes and position one close to each plant and use the twine to tie them on the stake.
- Topping: Topping should be done in late summer as harvest time approaches. This involves taking off the tip on top of each plant to encourage maturity throughout the stalk. Perform this action using hand pruners, just clip off about 2-3 inches off the plant’s top. It’s pretty simple.
Time for Harvest!
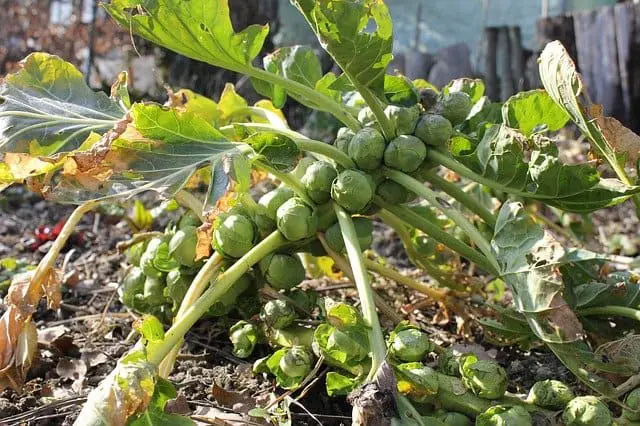
After you’ve shown your plants love for months, they’ll reward you with juicy, tasty, fully ripe heads to harvest. You can begin harvesting after frost. Frost helps to further sweeten the sprouts. You’ll know your sprouts are ready to be picked when they’re fully rounded, firm to touch, and about one inch long. You can either harvest sprouts individually or cut up the complete stalk.
If you’ll be harvesting single sprouts, pick from the stalk’s bottom toward the top of the plant. Clip off leaf right below sprouts to harvest them. Then, twist with your hands and pull to get the sprout and it’ll come right off or you can use a knife. Be careful not to hurt yourself though.
You can harvest the complete stalk if the sprouts on the stalk are of similar size. To harvest stalk, cut up the stem using loppers. It might be a bit difficult to use hand pruners. You can preserve stalks for some weeks in a root cellar or refrigerator. Keep the stalks in plastic bags first.
For those who prefer harvesting in the winter, provide insulation for your plant with straw or boughs to protect them from the extreme cold temperature. You can use your fresh cabbage as you’d like and even share it with your family and neighbours. It might motivate them to grow some too.
Common Pests & Diseases Which Affect Brussels sprouts
With the tips above, you’ll be able to grow healthy Brussels Sprouts. However, you need to take into consideration the pests and diseases that may affect your plants so you’ll know how best to protect them.
- Cabbage worms: Cabbage worms are known to affect members of the cabbage family, including cabbage, kale, broccoli, and Brussels Sprouts. They usually lay eggs on plant leaves which later hatch and begin destroying the foliage. To protect adult butterflies from laying their eggs on your plants, cover them up using light insect barrier material or row cover (you can float with hoops as well). Also, inspect plants and handpick eggs you find on them.
- Aphids: These tiny, soft creatures will take up plant juice. To rid your plants of aphids, spray with water using a hose or spray plants with soapy water. Aphid infestation is detrimental to your plant’s health so keep an eye out for these little trouble makers.
- Slugs: Slugs are greatly disliked by gardeners due to their slimy nature. Handpicking works as a control method for slugs. Also, apply some diatomaceous earth around your plants to wade them off. Once wet the earth is useless, so reapply after it rains.
- Cabbage root maggots: Early intervention is important to deliver your plants from these pests. They usually feed on plant roots which results in wilting leaves. Cardboard collars will help prevent adults from laying eggs. Row covers will also help protect young plants.
- Clubroot: This fungal disease is characterised by the formation of galls on the roots of affected plants. This will limit its ability to absorb nutrients and water so plant growth becomes affected. It’s best to protect your plants from getting infected by this disease. The practise of crop rotation is beneficial in preventing diseases. Avoid using the exact same garden area twice in a row for your Brussels Sprouts.
Final Words
Growing Brussels sprouts in your allotment or home garden is quite easy provided you have the right information to guide you.
With this guide, you should be able to start Brussels sprout seeds (indoors or directly) and ensure the plants have everything they need to bless you with healthy sprouts for harvest within a few months.
Harvest time usually begins in late autumn and may continue into early winter. By then, you can harvest individual sprouts or the full stalk to use as you like. You’ll be proud of yourself and perhaps be motivated to grow more vegetables in the next season.
Glossary
[1] Brussels Sprouts – Link