Creating a flower garden can be a nuance, although the end can be profiting, it takes a much complex process to achieve. Also, challenges are not limited to just the planning and early stages, as it can get exhausting trying to find a guide for your level of experience. Flower gardens are fun, purposeful and rewarding; this post will show you how to make the best of it even as a beginner[1]!
Flower Gardening Tips
Step 1: Survey Your Space
Familiarize yourself with your land and select a befitting portion; make sure to consider: presence or absence of tall trees, contours of the garden landscape and soil type- you can collect samples for a lab test.
Step 2: Extent Of The Sun
Flowers require energy to do well, and this energy is derived from the sun. Your chosen site must have access to sunlight at least 7-8 hours a day, throughout the growing season. To know this, you can study the portion that receives more sunlight from your patio or buy a sunlight calculator if you can’t survive the stress.
Step 3: Flowerpedia
First, you must know the flowers that will thrive in your soil. Flowers are basically classified into annuals and perennials. The former completes its life cycle in one year, demands more care and attention unlike the latter that stays alive for years- it may die off in winter but the root will remain active, thus it sprouts again in spring. Perennials do not need extra care. Some are “plant-and-forget” while annuals, on the other hand, can be a chore, or it could also be a way to renew your garden’s look every year.
One way to balance this out is planting both, but making perennials the backbone of your garden. Alternatively combing foliage plants in a pot is a brilliant idea, but ensure they have compatible needs. Below are ten easy-care flowers that you could begin with;
Annuals
- Sunflower
- Drought and heat resistant
- Blooms during summer
- Flourish in full sun
- Withstand all soil types except waterlogged
- Marigolds
- Rapidly grows from seed
- Blooms in spring, summer, and fall
- Grows in well-drained, dry or sandy soil
- Repels mosquitoes
- Nasturtium
- Possess edible leaves and flowers
- Blooms from May to September
- Requires full sunlight
- Water regularly
- Morning Glories
- Thrives in full sun and well-drained soil (moderately fertile)
- Blooms in late summer or early fall
- Can cover walls or trellises
- Attracts birds and butterflies, although seeds are toxic if ingested
- Zinnias
- Blooms during summer
- Thrives in full sun
- Prefers well-drained soil
- Sweet Peas
- Flourish in a loamy soil
- Well-scented flowers
- Water at the base
- Requires support, e.g. fence
Perennial
- Dahlias
- Thrives poorly in a hot and humid season
- Blooms after eight weeks of planting tubers
- Daylilies
- Heat and humidity resistant
- Flourish in full sun
- Best to plant in spring
- Pest free
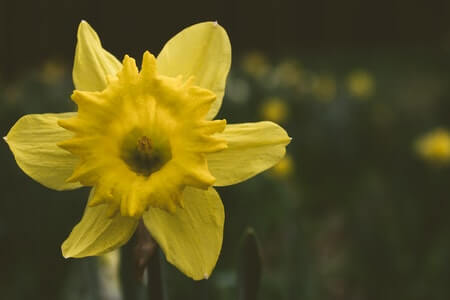
- Daffodils
- Blooms in late winter or early spring
- Water regularly especially in spring and fall
- Lavender
- Drought tolerant but water deeply
- Bloom in late June until august
- Attracts butterflies and bees but repels mosquitoes
Step 4: Tools to Get
Below are some of the tools you will need to cultivate a flower garden:
- Soil knife
- Spade/shovel
- Garden hoe
- Wheelbarrow
- Watering hose and can
- Pruning shears
- Weeder tool
- Rake
- Scissors
- Gloves
- Digging fork
- Sun’s hat
- trowel

Step 5: Get Your Hands Dirty
The next thing is to start working on the ground, prep your soil by clearing out weeds, debris, unwanted rocks and plants. Dig up sods- they effectively fill patchy spots on the lawn.
Step 6: Making The Beds
There are two options to this aspect, either you-
- build a raised bed or,
- remove the top layer of the sod, dig up and dress the soil underneath.
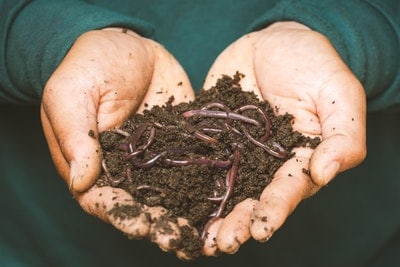
The former sells as a kit in most garden centres or you can look up a video online for precise knowledge. You can amend your soil by adding organic matter to enrich it, this takes time so, it’s best you prepare your beds early.
Decaying leaves, manure, kitchen compost, and grass clippings are good examples of organic matter. Till your beds when the soil is slightly moist and warm- try making a loose ball with your fist, that scatters upon impact to the ground; this shows the soil is ready for tilling.
Step 7: the Planting Layout
The beauty of your garden also rests on the shoulders of the layout. When considering the placement of your floors, keep the size of each flower in mind; for instance, border the large flowers with rows of smaller flowers will help the smaller ones receive sunlight.
This step also lets you play with the colour arrangement, for a cool background flower with white, yellow and purple are great depending on the colour scheme of your taste. Keep In mind that flowers should have similar growing needs so sharing of beds is possible. Garden beds can be space consuming; mapping your plant layout is a way to maximize space.
Step 8: Plant And Nurture Your Flowers
Since you know what you want your garden to look like, it is time to take action. Plant your flowers mostly early spring or fall; water per requirements, and once they begin blooming, sit back and appreciate a job well done.
Glossary
[1] Link